Alright, flavor seekers! River Quinn here, ready to share one of my family’s absolute favorite ways to enjoy the simple pleasure of Japanese rice balls: Easy Yaki Onigiri.
I’ll never forget the first time I saw my kids devour these crispy, savory triangles. It was a weeknight, I was short on time, and I needed a quick, satisfying meal.
I had some leftover rice, a bottle of soy sauce, and a sprinkle of sesame seeds. That’s when the magic happened! We quickly transformed it into these Easy Yaki Onigiri.
It became more than just a meal; it became a cherished tradition, a symbol of our connection through authentic flavors. My youngest now requests it for school lunch all the time!
This Easy Yaki Onigiri recipe has become a weeknight staple in my kitchen, and I’m excited to share it with you. It’s simple, satisfying, and packed with umami goodness.
Join me on this kitchen adventure, and let’s create some unforgettable family moments, one delicious Easy Yaki Onigiri at a time. Fellow flavor seekers, this one’s for you!
INGREDIENTS You’ll Need:
Here’s what you’ll need to whip up a batch of these delightful Easy Yaki Onigiri. Trust me, this ingredient list focuses on quality over quantity for authentic flavors!
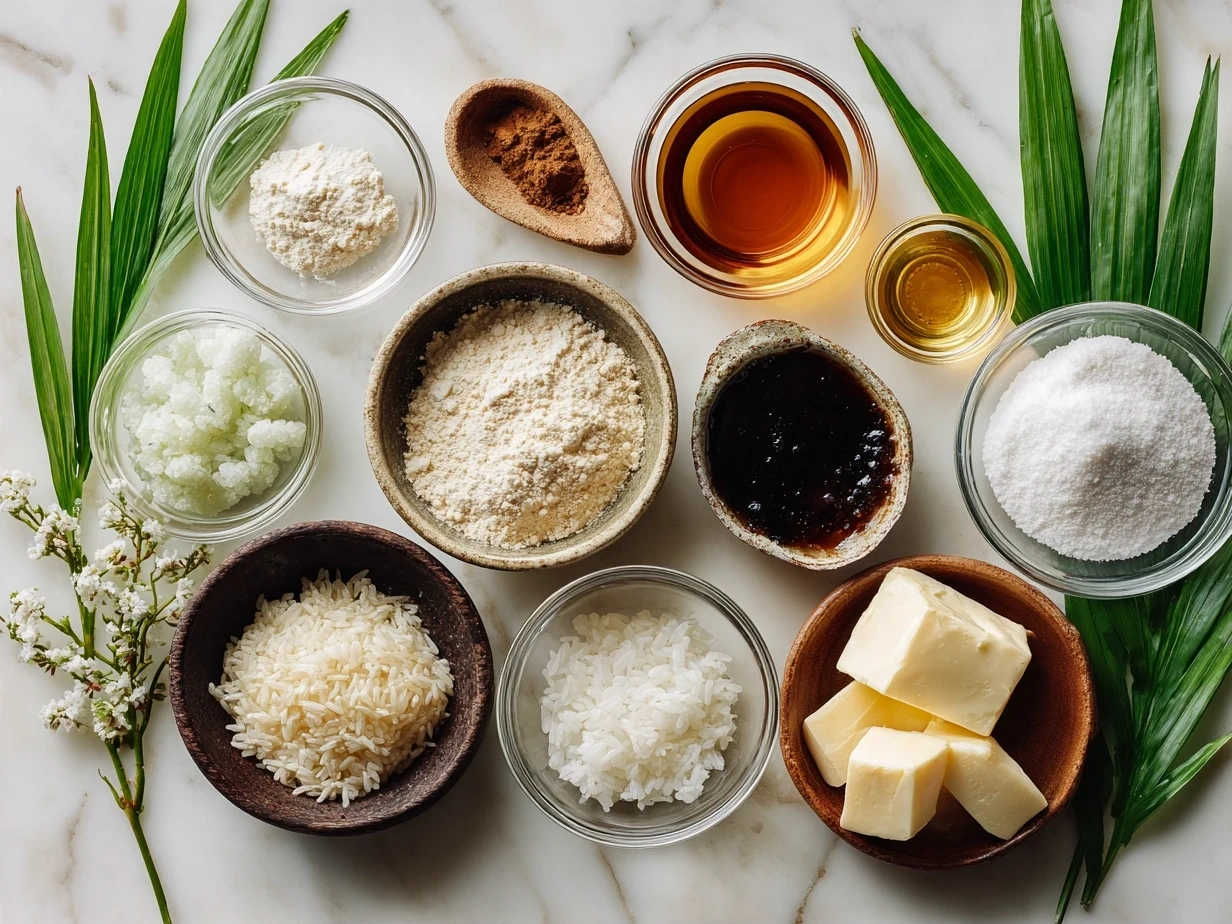
- 2 cups cooked Japanese short-grain rice: Use freshly cooked rice for the best texture and flavor.
- 2 tablespoons soy sauce: I prefer low-sodium soy sauce to control the saltiness.
- 1 tablespoon mirin (sweet rice wine): This adds a touch of sweetness and balances the savory flavors.
- 1 teaspoon sesame oil: This infuses the Easy Yaki Onigiri with a nutty aroma.
- 1/2 teaspoon grated ginger: Fresh ginger adds a warm, subtle spice.
- 2 tablespoons toasted sesame seeds: Adds a nutty crunch and visual appeal.
- Nori seaweed sheets (optional): Cut into strips for wrapping around the Easy Yaki Onigiri.
For the best flavor in your Easy Yaki Onigiri, I recommend sourcing high-quality Japanese short-grain rice. You’ll find the freshest ingredients at your local Asian grocery store.
Don’t underestimate the power of good soy sauce! This Easy Yaki Onigiri proves that authentic flavor comes from thoughtful ingredient choices. My family loves when I add furikake for an extra touch to our Easy Yaki Onigiri.
Here’s an Easy Yaki Onigiri flavor secret that transformed our family dinners: Toast your sesame seeds lightly in a dry pan before adding them. The aroma is incredible! Remember to stir constantly to avoid burning.
Let’s Create This Together!
Now, let’s get to the fun part! These step-by-step instructions will guide you through creating your own batch of Easy Yaki Onigiri.
- Prepare the rice mixture: In a large bowl, gently combine the cooked rice, soy sauce, mirin, sesame oil, and grated ginger. Be careful not to mash the rice.
- Shape the onigiri: Moisten your hands with water to prevent the rice from sticking. Take a handful of the rice mixture and form it into a triangle shape. Press firmly to pack the rice together, but not too tightly.
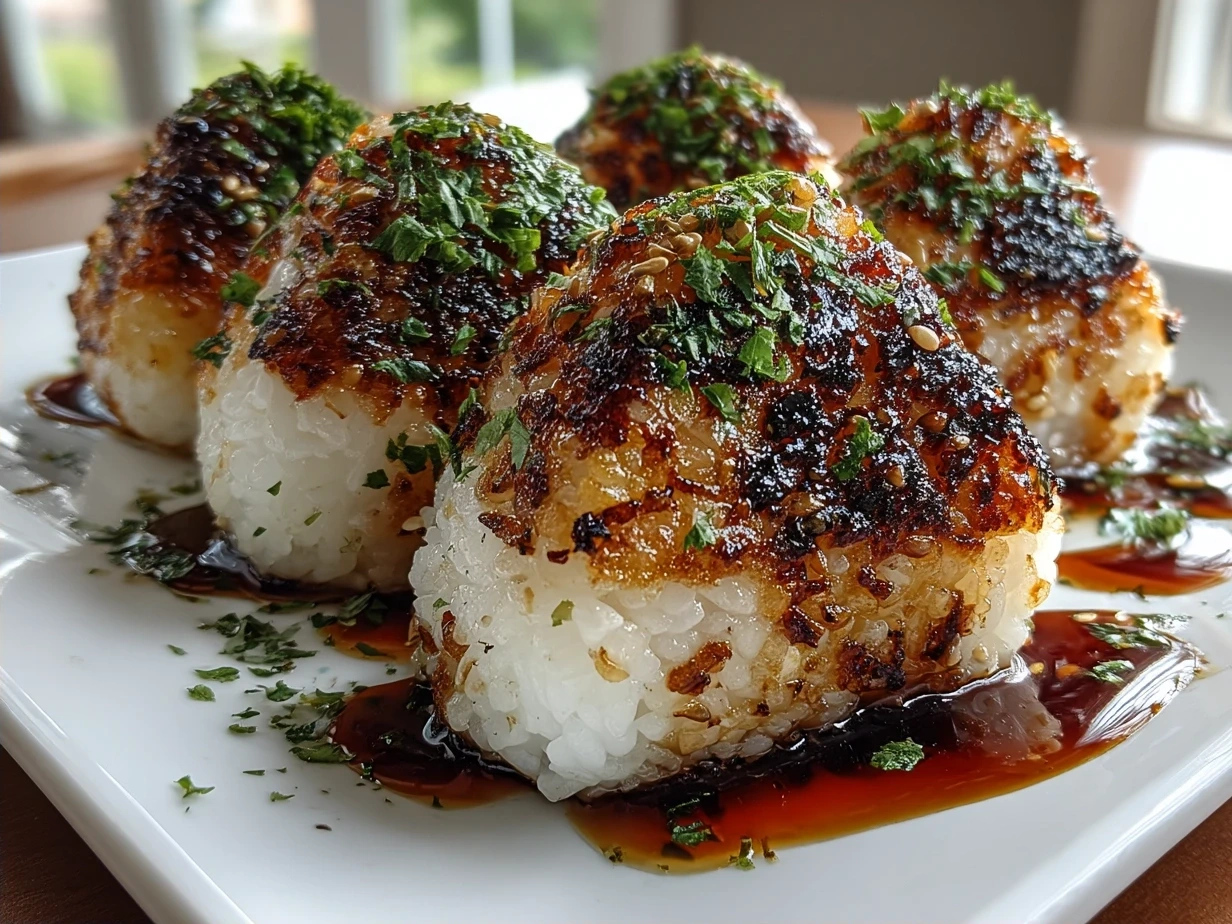
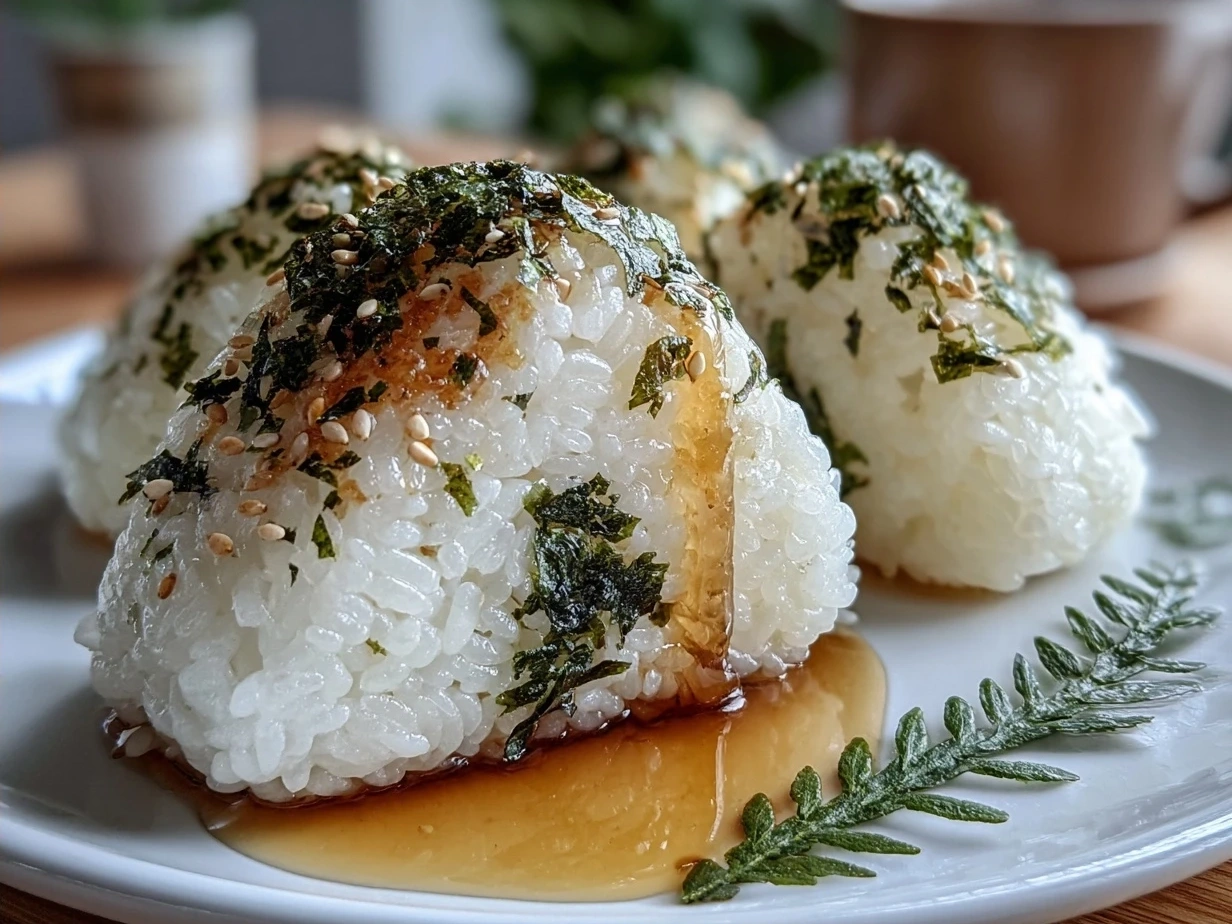
- Grill the onigiri: Heat a lightly oiled skillet or grill pan over medium heat. Place the Easy Yaki Onigiri on the hot surface and grill for 3-4 minutes per side, or until golden brown and slightly crispy.
- Brush with sauce: During the last minute of grilling, brush the Easy Yaki Onigiri with a mixture of soy sauce and mirin. This will add a beautiful glaze and enhance the savory flavor. This will also give it that authentic yaki onigiri sauce flavoring that is delicious!
- Garnish and serve: Remove the Easy Yaki Onigiri from the grill and sprinkle with toasted sesame seeds. Serve immediately, wrapped with nori strips if desired.
In my kitchen, this flavorful Easy Yaki Onigiri typically takes about 20 minutes from start to finish. While your Easy Yaki Onigiri is developing these flavors, take a moment to appreciate creating something special for your family!
Here’s where I used to miss a key step with my Easy Yaki Onigiri – learn from my experience! Make sure your pan is hot enough before adding the rice balls.
Perfect time to appreciate the aromatic transformation! Don’t be surprised if your Easy Yaki Onigiri develops a slight crust on the bottom. It adds a delightful texture.
I learned from my grandmother that grilling the rice balls slowly is key to achieving that perfect crispy exterior without burning the inside. Your Easy Yaki Onigiri should fill the kitchen with amazing aromas by now!
How We Love to Enjoy This!
Our family enjoys Easy Yaki Onigiri in so many ways! It’s perfect as a quick snack, a light lunch, or a side dish with our favorite Japanese meals.
The family gathers quickly when this aromatic Easy Yaki Onigiri appears with a side of miso soup and some quick Japanese Katsu Bowls! I love adding a simple salad of cucumbers and seaweed.
Easy Yaki Onigiri is perfect for those evenings when we want something truly satisfying but don’t want to spend hours in the kitchen. The kids love taking them in their lunchboxes.
We also enjoy Easy Yaki Onigiri as part of a bento box for picnics. It’s easy to pack and travels well. During the summer, we love grilling them outdoors for a smoky flavor.
For a fun presentation, arrange the Easy Yaki Onigiri on a platter with small bowls of dipping sauces like soy sauce, sriracha mayo, or sweet chili sauce.
Leftover Easy Yaki Onigiri can be stored in the refrigerator for up to 2 days. Reheat them in a skillet or microwave. You can even crumble them up and add them to fried rice!
My youngest prefers her Easy Yaki Onigiri with a sprinkle of dried seaweed flakes, while my eldest loves them dipped in spicy mayo.
We sometimes make vegetarian onigiri by adding finely chopped vegetables like carrots, peas, or edamame to the rice mixture. I love exploring other authentic preparation methods to keep it exciting for the family!
FAQs: Your Questions Answered
Here are some frequently asked questions about making Easy Yaki Onigiri. I hope my answers will help you on your kitchen adventure!
Does this Easy Yaki Onigiri really satisfy hearty appetites? Absolutely! The combination of rice, savory seasonings, and crispy exterior makes it surprisingly filling.
What if someone in my family prefers milder flavors in their Easy Yaki Onigiri? You can easily adjust the amount of soy sauce and ginger to suit your family’s taste preferences. Consider offering a variety of dipping sauces.
How can I prepare this Easy Yaki Onigiri ahead for busy weeks? You can shape the onigiri ahead of time and store them in the refrigerator. Grill them just before serving.
Can I use different types of rice for this recipe? While Japanese short-grain rice is ideal, you can also use medium-grain rice. Avoid long-grain rice, as it won’t hold its shape as well.
Is there a vegetarian version of Easy Yaki Onigiri? Yes, you can easily make vegetarian Easy Yaki Onigiri by adding finely chopped vegetables or mushrooms to the rice mixture.
What are some good fillings for Easy Yaki Onigiri? Get creative with fillings like cooked salmon, tuna mayo, pickled plums (umeboshi), or seasoned seaweed (wakame).
Can I freeze Easy Yaki Onigiri? Yes, you can freeze Easy Yaki Onigiri after grilling them. Wrap them individually in plastic wrap and store them in a freezer bag. Reheat them in a skillet or microwave.
How can I prevent the rice from sticking to my hands when shaping the onigiri? Simply moisten your hands with water before handling the rice. This will prevent it from sticking.
Final Kitchen Wisdom:
This Easy Yaki Onigiri is more than just a recipe; it’s a way to connect with your family through the joy of cooking and sharing a delicious meal. It perfectly supports my family’s authentic meal goals.
My Easy Yaki Onigiri Flavor Secrets:
- Toast the sesame seeds: This enhances their nutty aroma and flavor.
- Use high-quality soy sauce: It makes a world of difference in the final taste.
- Don’t overpack the rice: Gently press the rice to shape the onigiri, but avoid packing it too tightly.
Family-Tested Easy Yaki Onigiri Variations:
- Spicy Tuna Onigiri: Mix cooked tuna with mayonnaise, sriracha, and a pinch of salt.
- Vegetable Onigiri: Add finely chopped carrots, peas, and corn to the rice mixture.
- Salmon Onigiri: Flake cooked salmon and mix it with the rice.
My youngest loves the vegetable version, while my eldest prefers the spicy tuna onigiri.
I hope this Easy Yaki Onigiri recipe inspires you to create your own signature version and share it with your loved ones. Enjoy the process and savor the delicious flavors!
Creating delicious meals doesn’t need to be daunting. Remember that even the simplest dishes, like this Easy Yaki Onigiri, can bring joy and connection to your family. Alternatively if you are looking for a more soothing meal, you could check out this Italian Penicillin Soup or even this Creamy Reuben Soup.
Fellow flavor seekers, I encourage you to embrace your kitchen adventures and discover the magic of authentic cooking! Your family will thank you for it!
If you want more inspiration, you could check out this thread on Reddit. Alternatively, you could check out this recipe at okonomi kitchen or even this Yaki Onigiri recipe!
\n \n Print
Easy Yaki Onigiri
Yaki Onigiri, or grilled rice balls, are a simple and delicious Japanese snack or light meal. This easy recipe uses pre-cooked rice and pantry staples for a quick and flavorful treat.
- Prep Time: 10 minutes
- Cook Time: 10 minutes
- Total Time: 20 minutes
- Yield: 4 servings
- Category: Snack
- Method: Grilled
- Cuisine: Japanese
Ingredients
- 2 cups cooked Japanese short-grain rice, cooled
- 2 tablespoons soy sauce
- 1 tablespoon mirin
- 1 teaspoon sesame oil
- 1/2 teaspoon sugar
- Nori seaweed sheets, cut into strips
Instructions
- In a bowl, gently combine the cooked rice, soy sauce, mirin, sesame oil, and sugar. Be careful not to mash the rice.
- Wet your hands with water to prevent sticking. Take about 1/2 cup of the rice mixture and form it into a triangle shape. Repeat with the remaining rice.
- Heat a lightly oiled skillet or grill pan over medium heat.
- Place the rice balls onto the hot skillet and cook for 3-4 minutes per side, or until golden brown and crispy.
- Wrap each yaki onigiri with a strip of nori seaweed. Serve immediately.
Notes
For an extra flavor boost, sprinkle some toasted sesame seeds over the rice balls before grilling. You can also brush them with a little extra soy sauce during cooking.